EN
EN
 AR
AR
 BG
BG
 NL
NL
 FR
FR
 DE
DE
 EL
EL
 IT
IT
 KO
KO
 PL
PL
 PT
PT
 RO
RO
 RU
RU
 ES
ES
 TL
TL
 IW
IW
 ID
ID
 UK
UK
 VI
VI
 TH
TH
 FA
FA
 AF
AF
 MS
MS
 SW
SW
 BE
BE
 UR
UR
 BN
BN
 KM
KM
 LO
LO
 LA
LA
 MI
MI
 MN
MN
 MY
MY
 KK
KK
 MG
MG
 SU
SU
 TG
TG
 UZ
UZ
 KY
KY
 XH
XH
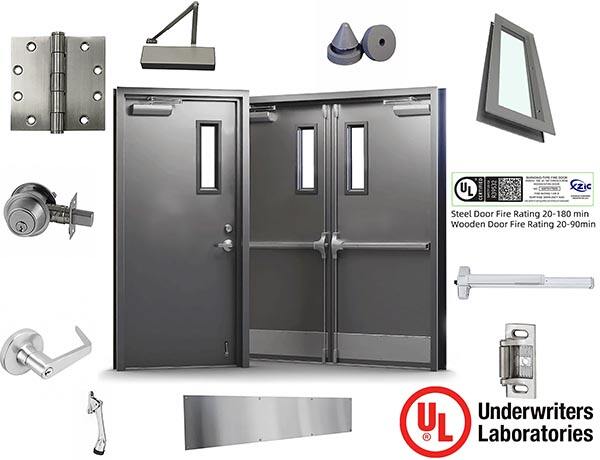


Shaker doors are loved by most homeowners. They make the home beautiful, especially because of the excellent look. It might sound a little hard, and it could even seem scaring if you have never made shaker doors before. Do not worry! Here, we have put together an easy-to-follow guide on how to build shaker doors in four simple steps. In this guide, we'll walk you through each step so by the end, you know exactly how to create beautiful shaker doors yourself.
Steps to Make Shaker Doors
Step 1: Measure the Door
Before anything, measurement of the door is prime. Which means you have to measure the size of the door. Measured the door height and width. Measurements are key as they determine what size the rails and stiles will be-the actual pieces of wood that comprise your door .
Step 2: Cut the Wood
Now that you have all your measurements, the next step is cutting the wood. You must use either a table saw or what is known as a handheld saw for cutting the right size of these rails and stiles вЂ" make these pieces to be cut after joints have been implemented. Always make sure that you have measured correctly before cutting. This additional step is to avoid any mistake.
Step 3: Sand the Edges
Cut the wood pieces and saw smooth out the edges. This is done by lightly sanding raised areas with sandpaper. The edges will need sanding so that the wood is pleasant to touch and you should not feel run your hand across the door.
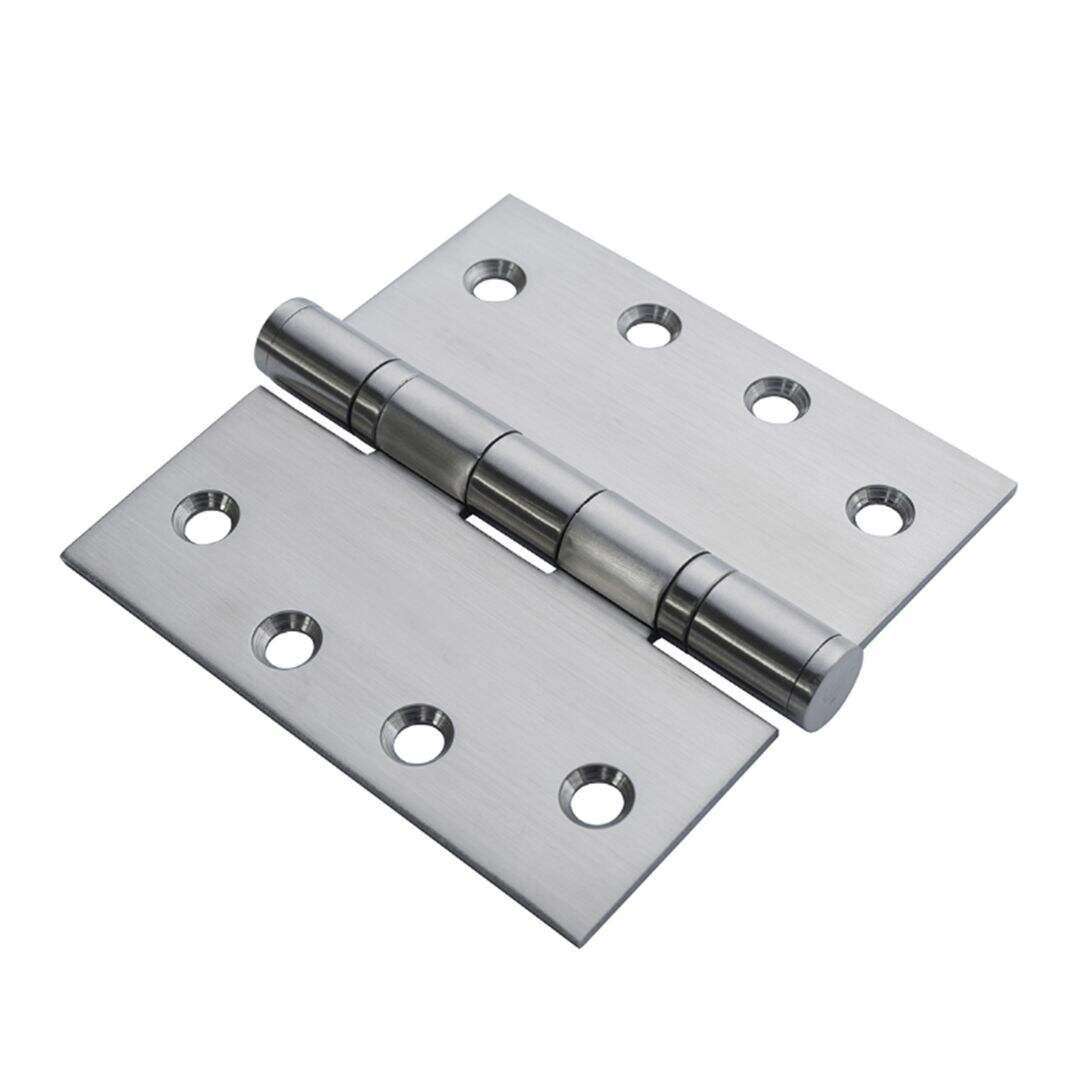
Assemble the FrameStep four:
The first thing to do now is to assemble the frame of the shaker door. For this, you use glue for the rails and stiles. After placing the glue, you would want it held in place while drying. So, this means you are clamping them together. Let the glue dry for at least a full day. In this case, 24 hours will be best. This is necessary so that no part with any of your broken pieces are detached with security.
Step 5: Installation of the Panel
After the frame is built and the glue has dried, it's time to install the panel. You would need to cut the panel to the right dimensions so it fits inside the frame properly. Fit the panel onto the frame after cutting. Apply a touch of glue around the periphery of the panel to keep it in place. This will keep it safe, and from moving around
Step 6: Sanding the Door
Sanding the whole doorAfter fitting your panel, there would be a necessity for sanding up some paints off. This can take the form of sandpaper for the entire door to be gotten rid of any bumping or scratches. This will involve a bit of your precious time, but it gives it a very crisp appearance when completed professionally.
Step 7: Apply the Finish
Finally, you apply that finish-the last step of your shaker door. You can either paint it, you can stain it and make it shine. Once you have applied the finish, let it dry fully before touching or installing. You want to ensure that you have followed the time for it to dry completely to give the best results.
Tips to Create Shaker Doors
Although shaker doors do take a little time to make and a lot of practice, here are some tips that will help troubleshoot the problem.
Making shaker doors
Having good tools can be the difference between making shaker doors. You need a good table saw, a handheld saw, and sander. Good tools will let you work fast and safely.
One rule of thumb to remember at all times is: Measure Twice, Cut Once! As the saying goes, measure twice, cut once.
Experiment with Shades: You're allowed to color your shaker doors bright or strong. It's your chance to show a bit of your personality and whimsy in your house.
More Tips from the Experts
For the best results, check out these helpful tips from our experts at XZIC:
Use Quality Materials: Selecting good wood for your shaker doors is essential. Quality materials will also make sure that your doors last for decades and look as good.
Choose a More Sturdy Finish: If possible go for polyurethane or some kind of tough finish. This type of finish protects shaker doors from scratches and other wear, so it will help them look good.
Slow down: There is no hurry to make your shaker doors. If you slow down, many common mistakes will be avoided, and everything will come together nice and cleanly.
Shaker Doors Are An Instant Upgrade to Your Home
Shaker doors are fantastic to add the style and elegance in any area of the house. Shake doors, which can be produced from XZIC, can also be personalized in many different ways that fit your taste. And every time you need to update the kitchen with a new look or build an atmosphere for your bedroom, you would be looking for shaker doors to give you the big change.
Conclusion
Shaker doors are extremely easy to make-at least they can seem that way, and we have a complete guide to making your own Shakers here! Using XZIC you can customize your shaker doors to create stunning features for your home's style and beauty. Now have fun doing it because you now have shaker doors!